So a short stringer needs to be added to the frame next to the keelson to allow for a rigid hole and a place to fix the skeg hub.

Since the inside of a SOF has no clear surface to attached anything water tight, I chose to build a skeg without a box, that would be made water tight on the outside of the boat.
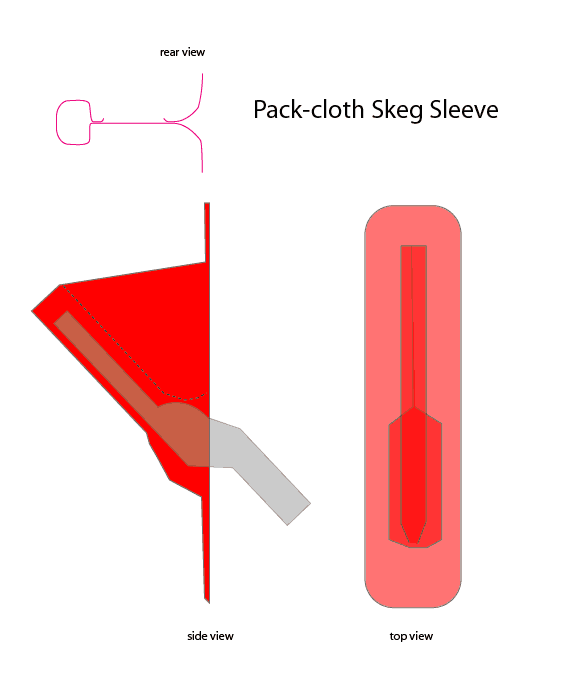
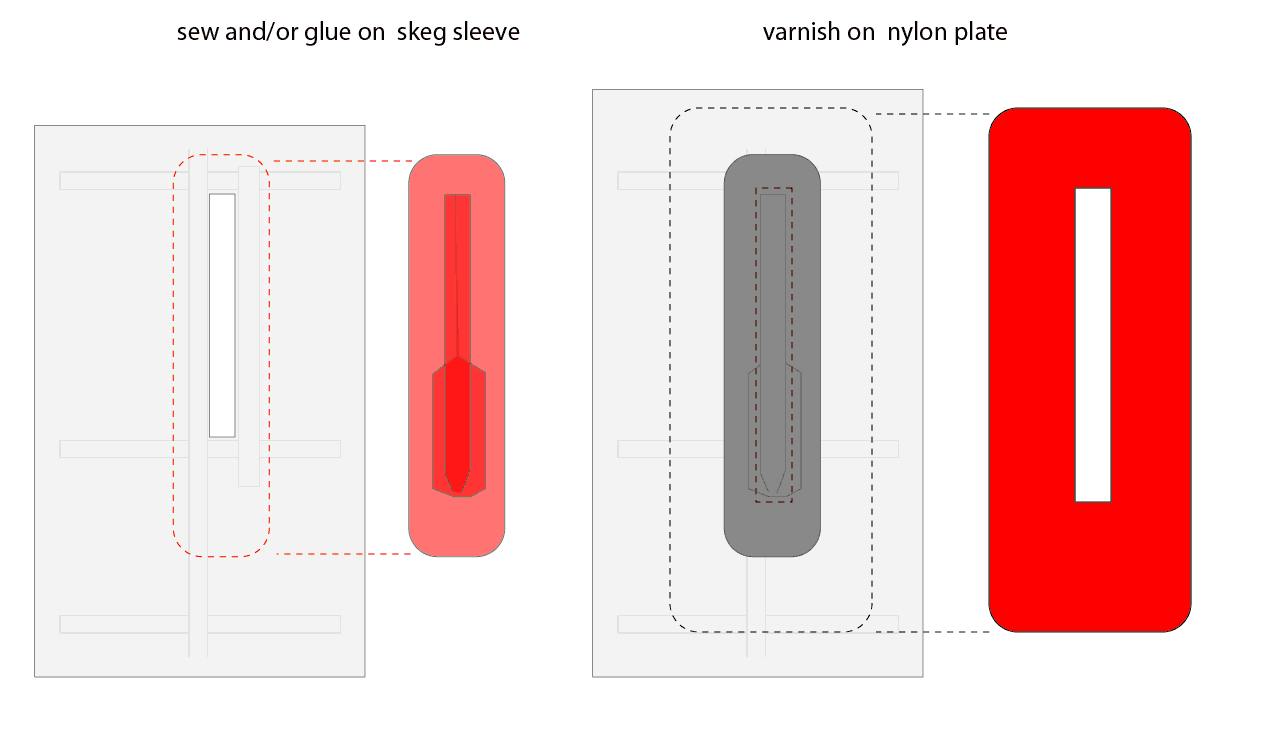
This was an improvisation, so the end result is kinda ugly. If I do it again, I'll try 2-mill neopreen. The skeg sleeve has a lot of intricate form to it,and a flexible fabric would be helpful. The trick to this is to make a good sleeve and leave enough room for movement in the sleeve for the skeg stick and its heal.
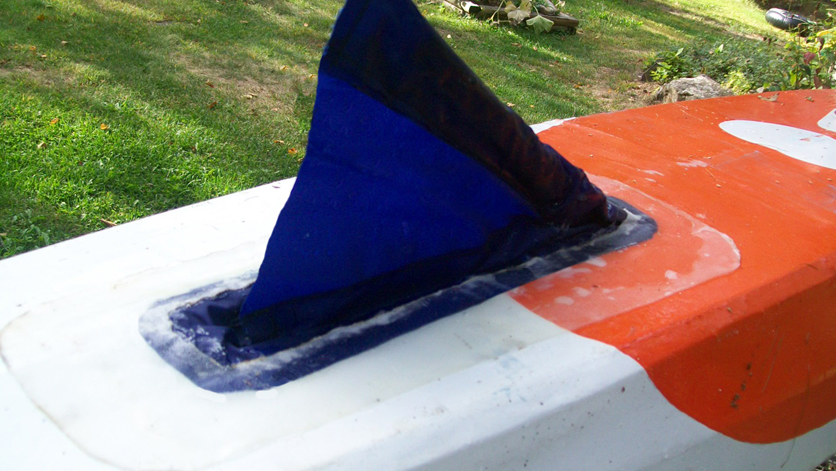
This is all hard to explain so hopefully these pictures with some notes will help. The skeg is a stick that gets covered in a sleeve that's kinda like a bat's wing or two webbed fingers. When the skeg is retracted, the web bunches up into the hole where the skeg lives.
So a short stringer needs to be added to the frame next to the keelson to allow for a rigid hole and a place to fix the skeg hub.
Here's the sleeve assembly. I wish I could provide a pattern, but I just assembled something around the skeg when it was installed in the frame.
You'll need to be able to take the skeg in and aout easily while working on this.
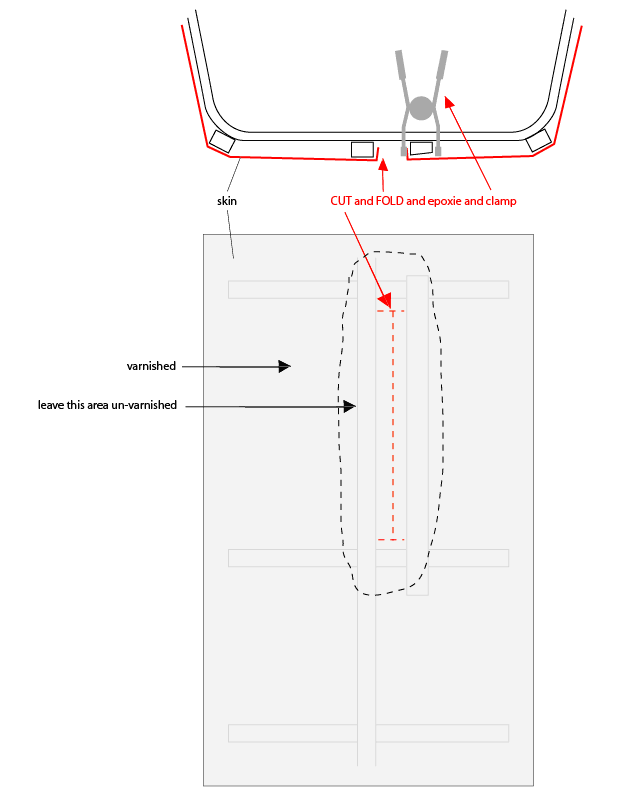
When ever I'm going to cut holes in a skin, I like to have most of it varnished/painted to stabilize the weave. Varnish or paint up to within a few inches of where the hole will. If you aren't planning on sewing the sleeve to the skin, you can varnish right up to the edge of the hole. I didn't sew mine. The sealant and varnish I added later was enough to seal and glue it all together. But sewing is probably a good idea too. If you sew, I'd put the seam a couple inched in from the outer edge so you can get a good wide bead of sealant between the cloth and the skin.
A note on clamping: It's hard to get enough clams in there. It might be better to wedge a thwart in there. Something that is exactly the right width to pin the skin to the keelson and the other stringer. Of course you'll need to use some kind of wax on the thwart to keep it from bonding with the varnish/PU.
After the skeg is attached to the skin, I cap it off with a large plate made form what ever you're skinning with. It will be more durable and gives you another change to get a good seal.
The fabric of the skeg is not perfectly flat as it has a lot of form to it. So the inner part of the plate will need a good flexible goop as a sealant between it and the imperfect skeg fabric.
I use Lexel for the inner inch of the plate, and varnish as a glue for the outer inch, and varnish over the top of the whole thing.
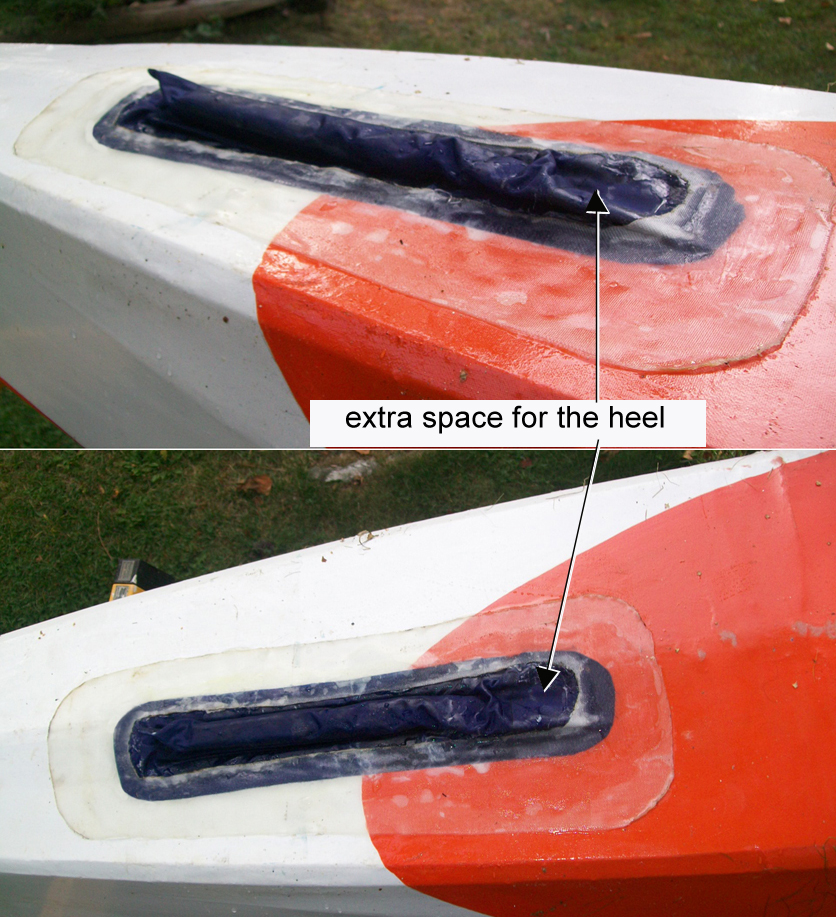
This shows the real thing. I wish it were prettier, but it seems to work. Ultimately, there needs to be quite a bit of width between the keel and the skeg to allow the fabric to bunch up inside the boat. In my case, part of the webbed part of the fabric sticks out when the skeg get retracted. I guess this will cause some drag, but I don't notice it.
When attaching the cloth to the skin, put the skeg in its retracted position, putting enough of the fabric into the boat so the end result is an ample pocket for everything to sit.
Start with enough cloth to build 2. If the first one doesn't have enough room for things to move and contract and leave enough fabric to seal to the hull, you'll need to start over (hopefully before you glue anything in place).